Are you stuck with LinkedIn Sales Navigator’s search, only able to see 100 pages of 25 results each? That’s just 2,500 profiles! Imagine missing out on potential leads when your searches bring in more. Let’s break free from this limit and unlock more opportunities.
In this Sales Navigator tutorial, we’ll not just address the issue but also provide a solution that helps you access all the leads in your list seamlessly.
Let’s explore the steps that go beyond the platform’s limitations.
Related article: How to Use LinkedIn Sales Navigator
How to Maximize Your Sales Navigator Searches
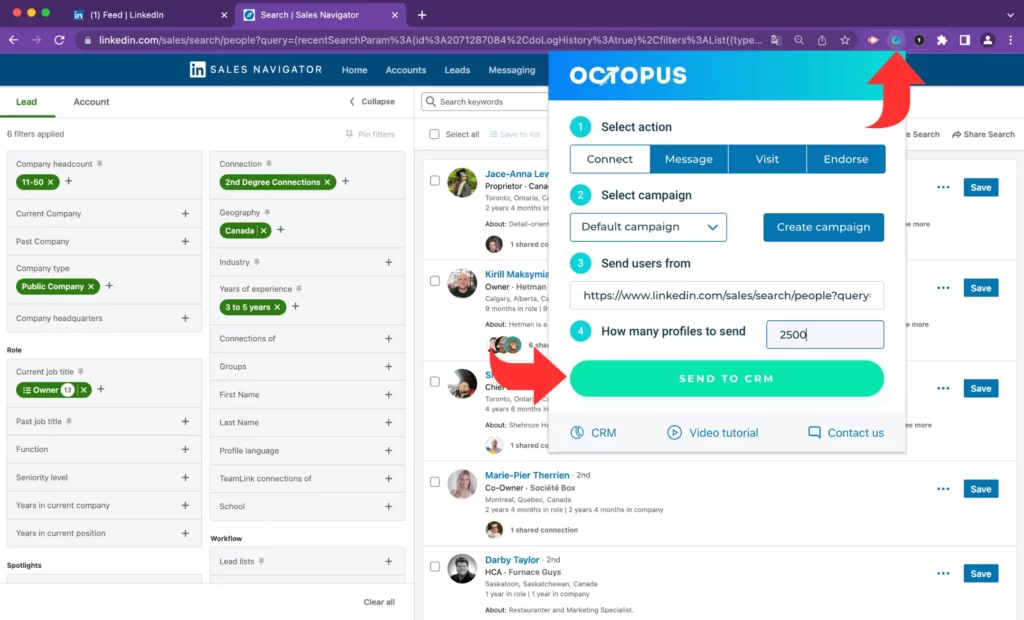
To overcome the constraints of Sales Navigator’s limited display of 100 pages with 25 results each, the solution is to divide your searches into manageable portions or “chunks”.
This approach ensures that you can navigate through a larger pool of potential leads effectively, even when your searches yield more than the platform’s initial display capacity.
Splitting your searches into chunks enables you to access and explore a broader range of relevant profiles.
But how do I split my searches into chunks? Follow the steps explained below:
1. Use the Right Search Filters
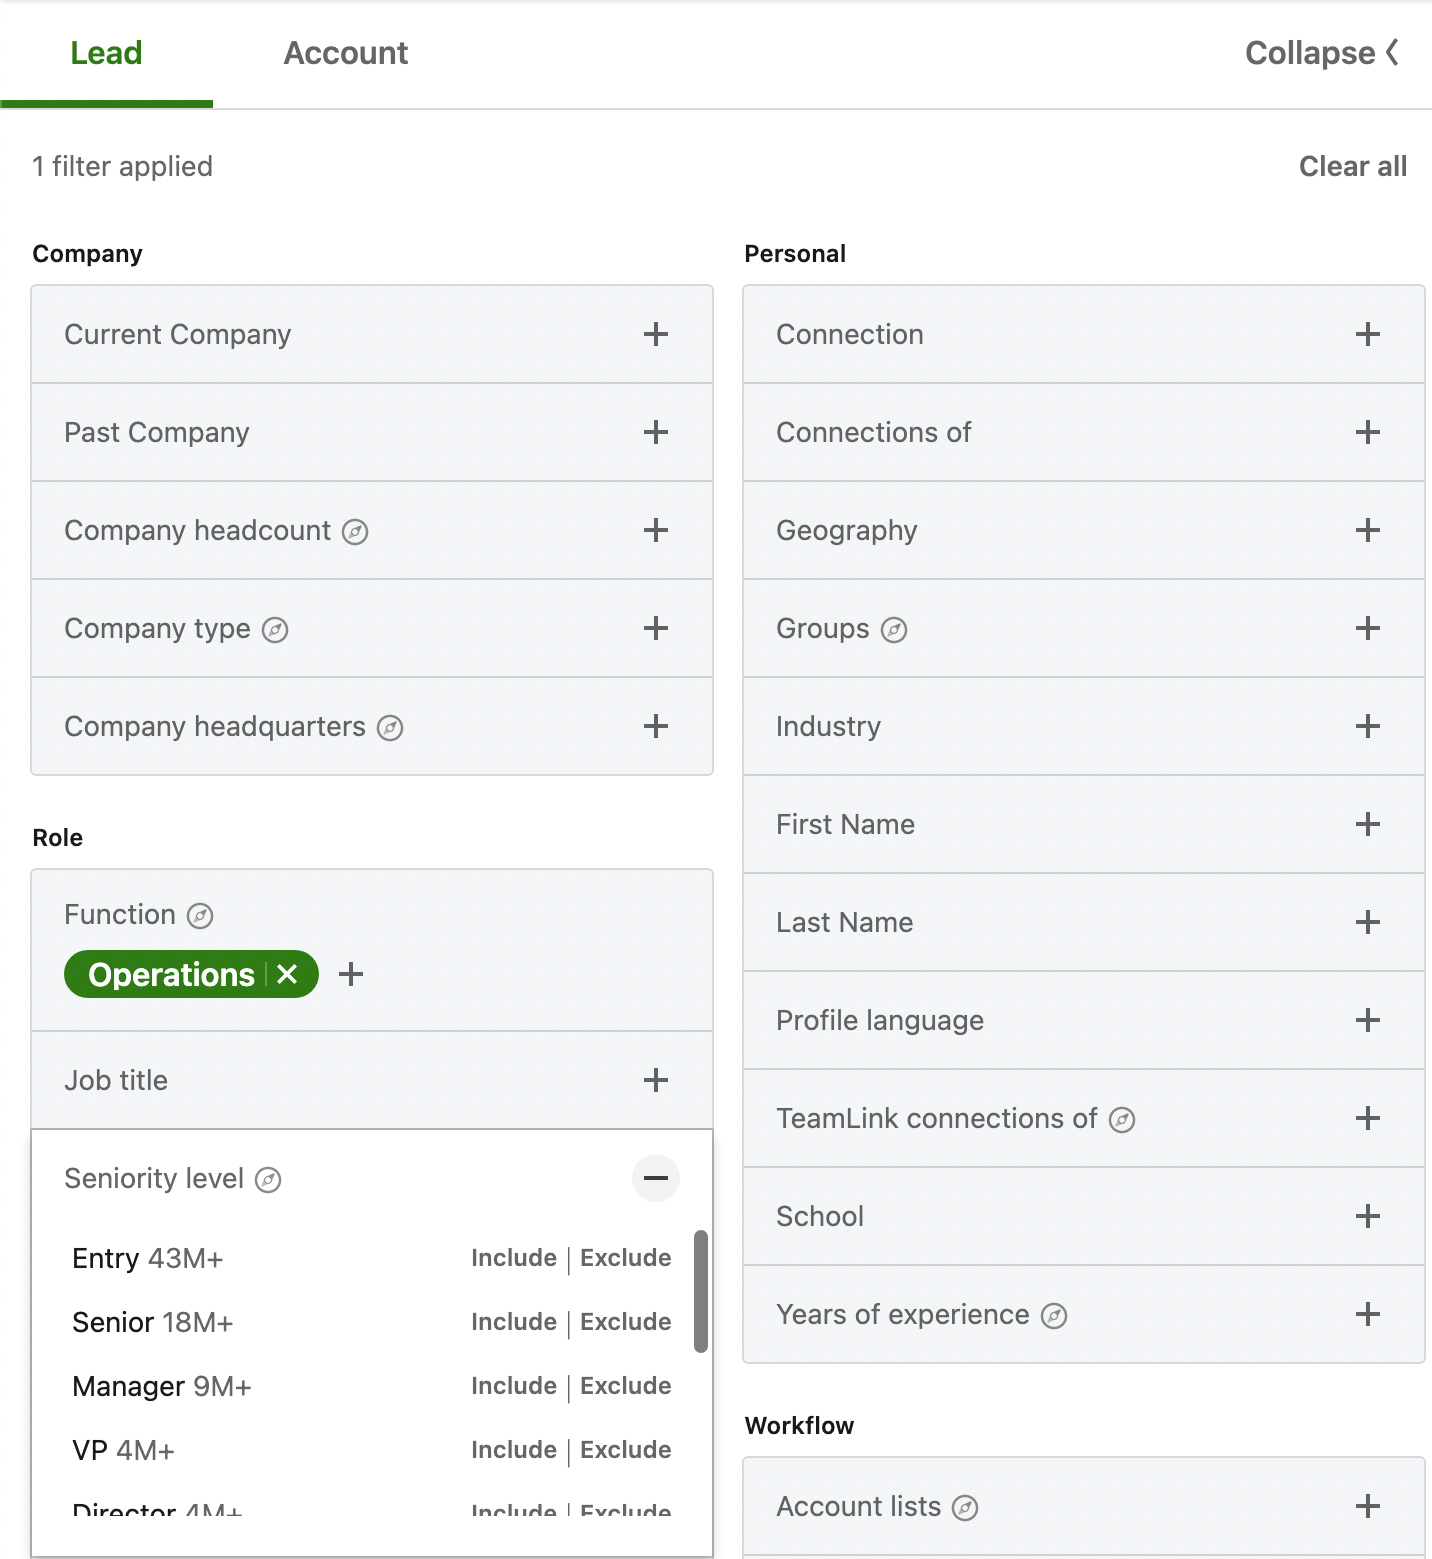
To efficiently split your Sales Navigator searches, focus on three key filters: Seniority Level, Function, and Industry.
Avoid using Company Headcount, as it could inadvertently exclude valuable leads.
For instance, it might exclude people with grey logos (no linked company pages) from your search results. These grey-logo profiles could be valuable leads, so be mindful not to miss out on potential opportunities.
2. Copy-Paste the Link into a Spreadsheet
Once you’ve narrowed down your initial search, copy the first chunk’s URL and paste it into a Google spreadsheet. This simple step is crucial because it creates a record of your search chunks.
Having this record makes it easy to modify and organize your searches later on. It’s like keeping a map of your journey, making the process smoother and more organized.
3. Exclude Used Search Filters
After saving the URL in your Google spreadsheet, the next step is to exclude the search filters you initially applied. It essentially trims down your search results by removing the leads present in the first chunk.
This way, you’re actually streamlining your subsequent searches, making them more focused and tailored to your evolving criteria.
It’s like refining your search to get rid of what you don’t need, ensuring that each subsequent step brings you closer to the most relevant leads.
4. Repeat the Process
Now that you have your first chunk saved and unnecessary filters excluded, it’s time to repeat the process. This is where you can use the available filters to further narrow down your search.
This iterative approach allows you to create manageable chunks of leads with each repetition.
Think of it as a refining process — with each step, you’re honing in on the specific criteria that matter most to you. This ensures that your searches become increasingly targeted, saving you time and energy while bringing you closer to the leads you’re looking for.
5. Export Your List to CSV
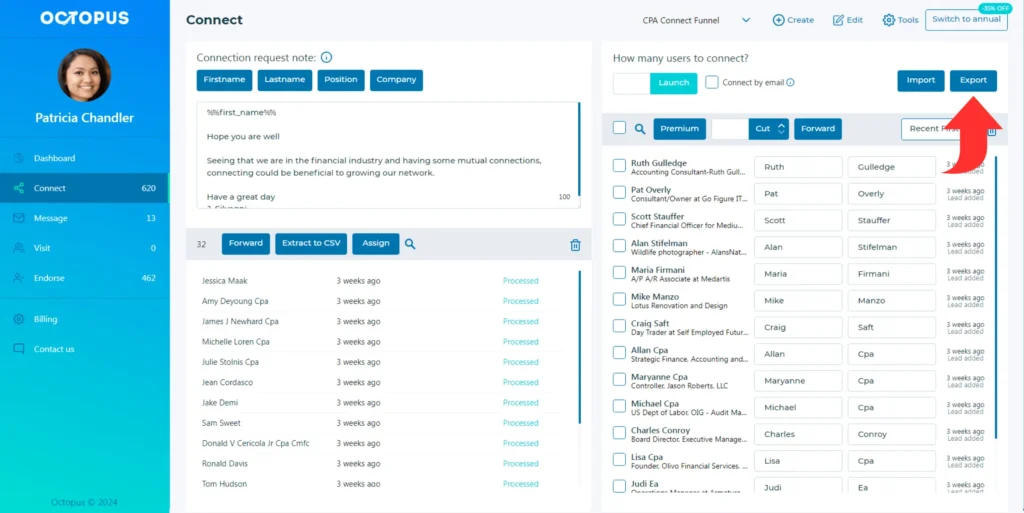
After breaking down your searches into segments and recording the corresponding URLs in your spreadsheet, the final step is to export your leads to a CSV file.
Here’s where the Octopus CRM LinkedIn automation tool comes into play.
With its convenient “Export with Octopus CRM” button integrated into Sales Navigator, this tool streamlines the entire process. Clicking the button automates the export, making the export a hassle-free experience.
It’s like having a shortcut that simplifies the often tedious task of exporting leads, ensuring a smooth and efficient conclusion to your search process.
Related article: How to Upload CSV Files to LinkedIn Sales Navigator
So, you’ve learned how to see more than 2500 leads in Sales Navigator Searches by dividing your searches into chunks. That’s great.
What if you’re interested in exporting your account searches?
Guess what? The same technique works smoothly here too!
Beyond Lead Searches: Account Searches Unleashed
How to Split Account Searches
There are two fundamental techniques at your disposal: Search filters and account lists.
1. Use Search Filters
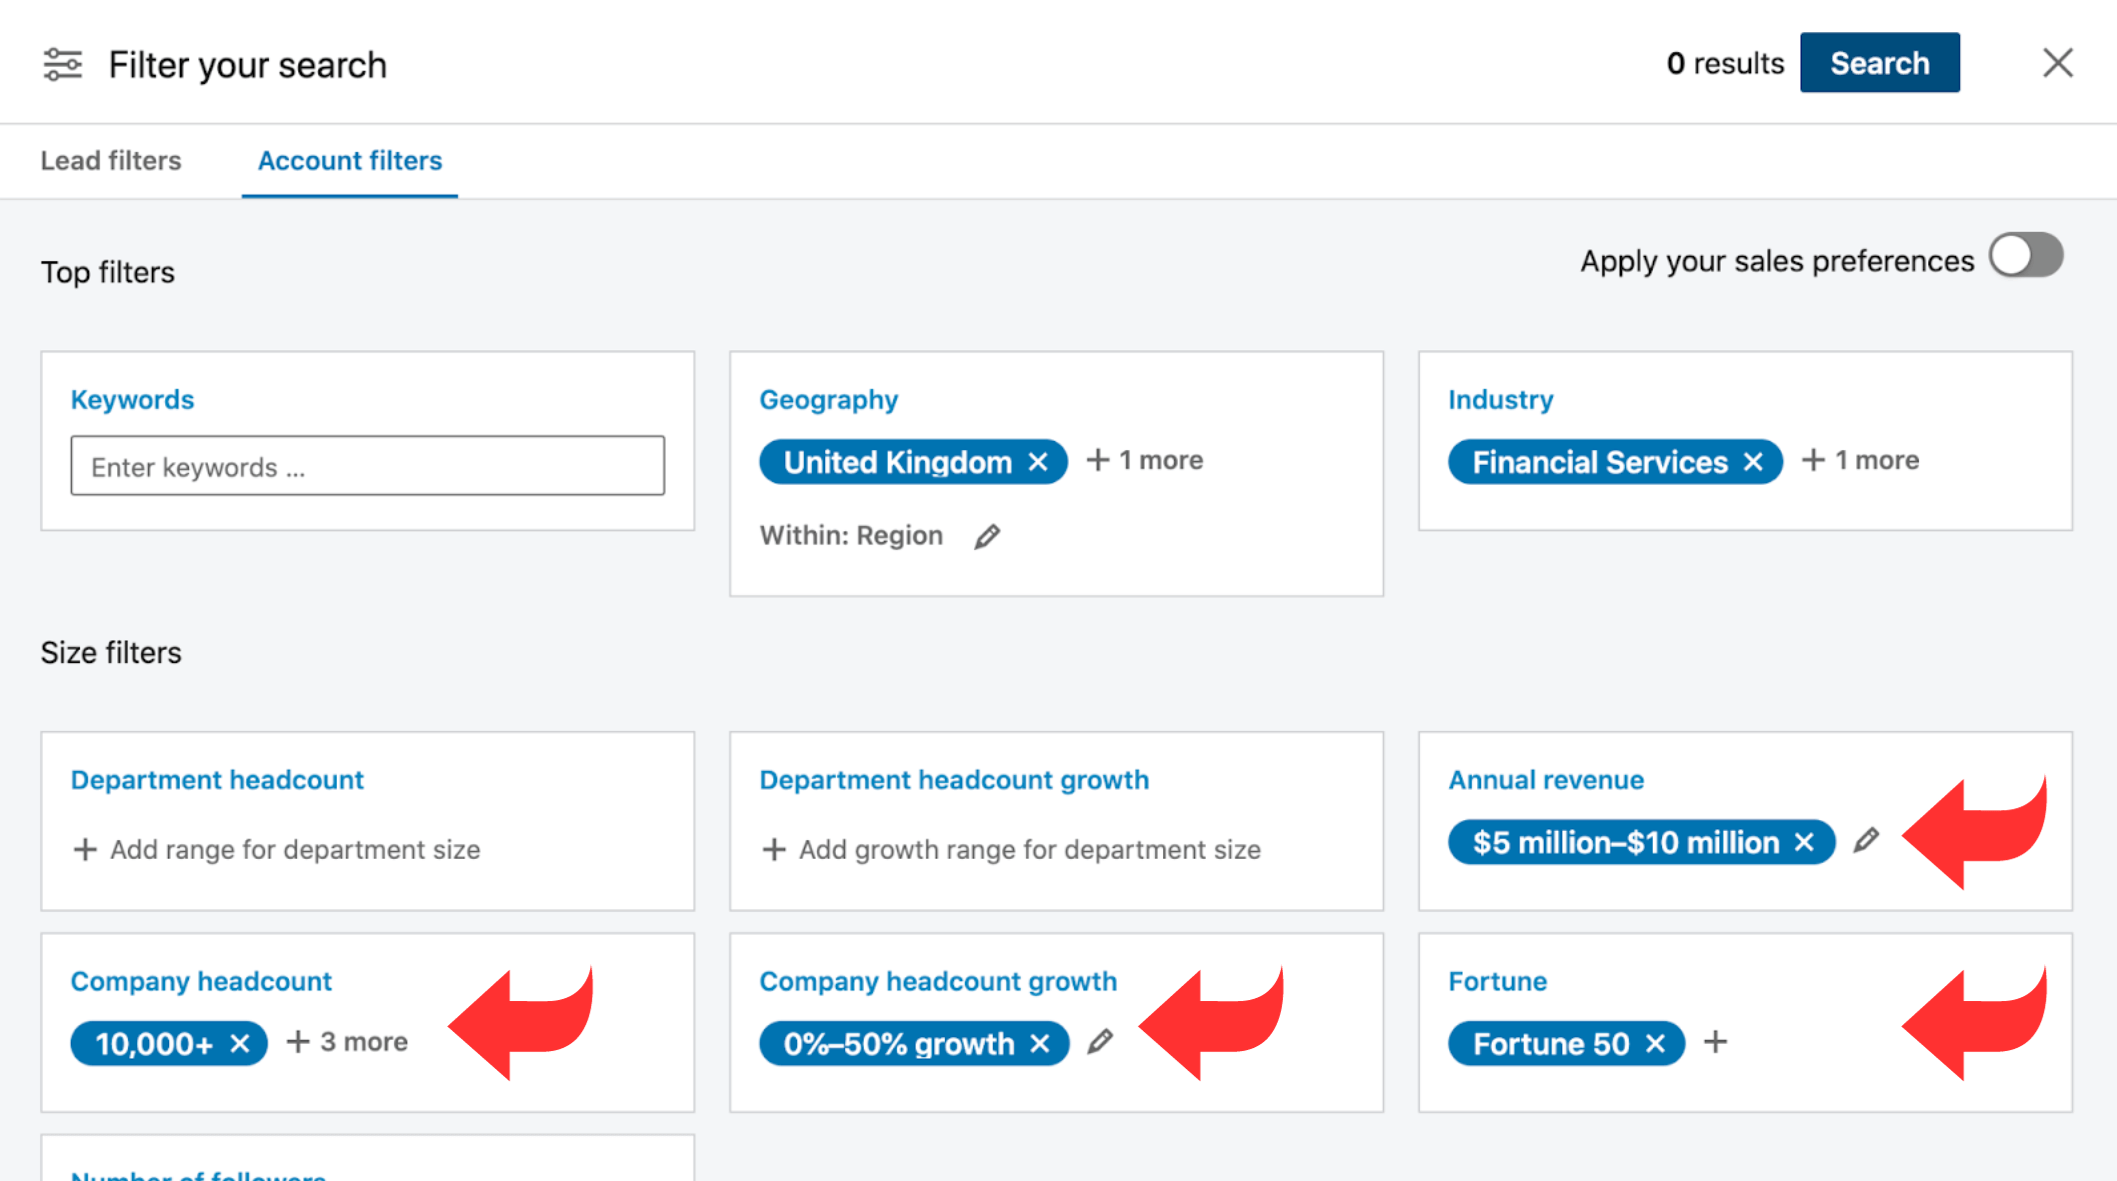
Use filters such as Company Headcount, Headquarter Location, Industry, Number of Followers, and Company Headcount Growth.
Here’s a simple trick: when dealing with smaller searches, you can effortlessly split them by using the “Number of Followers” filter. It neatly organizes your results, making the process super easy and efficient.
For larger searches, the “Number of Followers” or “Company Headcount Growth” filter can effectively split your search into manageable portions.
For instance:
- All companies having negative growth rate (-100% to 0)
- All companies having 1-10% growth
- All companies with above 10% growth (11% to 100%)
If your list is huge, just cut it into smaller pieces. This way, you can manage it more easily and make the most out of each part without getting overwhelmed.
2. Use Account Lists
Creating Account Lists offers an alternative yet simple approach.
To begin with, add all available searches to a list (up to 999 accounts). Then exclude companies or other list from your search results. Next, build new lists iteratively until your search results contain fewer than 1000 accounts.
While this process may require manual effort, with 25 accounts added per iteration, it ensures you can efficiently manage and navigate through your account searches.
Conclusion
Ready to supercharge your LinkedIn Sales Navigator experience? While the platform’s limitations can be frustrating, there’s a way to break free and discover a goldmine of untapped opportunities
Simply follow the steps explained above and use the Octopus CRM Chrome extension to break free from Sales Navigator’s limitations. Discover a treasure trove of leads and accounts, ensuring you don’t miss any opportunities.
